Introduction:
Data Validation is meant to ensure that user inputs correct type of information in the cell. The Data Validation can be achieved in the form of “Drop-down Lists” that make sure that user can only choose from a given set of values or using options like input being whole number, a decimal value, a date or something defined by a formula.
The data validation menu can be accessed by using the short cut keys Alt A V or user can simply click on the data tab – the data validation options are present on the right side of the ribbon:

We will explore options with reference to their usage in an accounting environment however this is applicable to any one that wants to implement data validation.
Example:
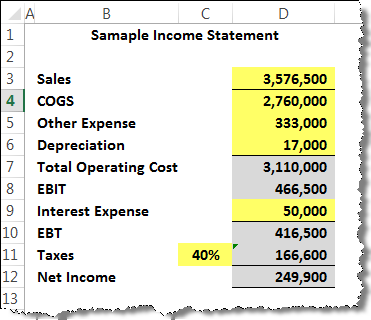
For this tutorial we will be using the following income statement along with few discrete examples where Data Validation Can be applied – this can be found in the companion excel sheet:
Options Available with Data Validation:
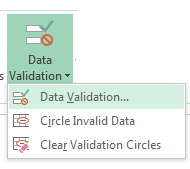
There are handfuls of options that are available to us. This includes:
- Data Validation
- Circle invalid data
- Clear invalid circle
Data Validation:
In order to get the correct type of input, we use the first option. We use it when we don’t have data and it has to be entered. That is before anything is entered in the sheet. When we choose this first option, Excel shows us further sub option to select from.
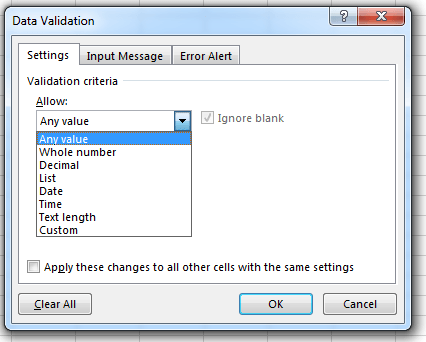
These options include:
- Any Value
- Whole Number
- Decimal Number
- List
- Date
- Time
- Text Length
- Custom
Any Value:
This means that anything can be entered in the sheet. It could be text, an integer, a float, date or time or anything else. This option could be used to allow user to enter comments and will show up no error at all in any case.
Whole Numbers:
Whole numbers represents quantities that cannot be divided into smaller units or fractions or simply they don’t have that decimal part in them. Whole numbers are used to represent – for example human being, vehicles, trees, bananas and oranges, books, pen and pencils etc.
When we choose to put whole number as input type – following dialogue box appears asking for maximum and minimum number for the input.
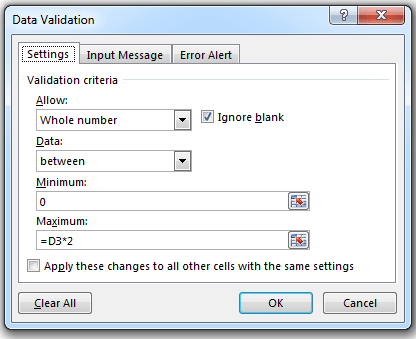
With reference to our example of income statement, we can set the entire column D to be whole number that is greater than zero and smaller than an amount say 2 times the total sales. When we enter the values: zero for minimum and D3*2 for maximum and press OK.
Now when we try enter value of 12760000 in COGS (by just adding 1 to the left of number) we will get an error.
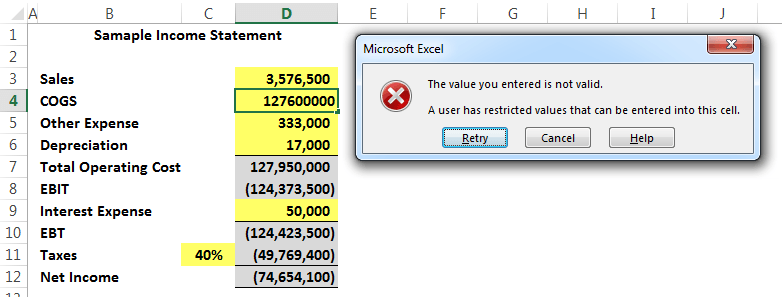
In this way only numbers that are whole numbers and are less than 2 x sales can be entered.
Decimal Values:
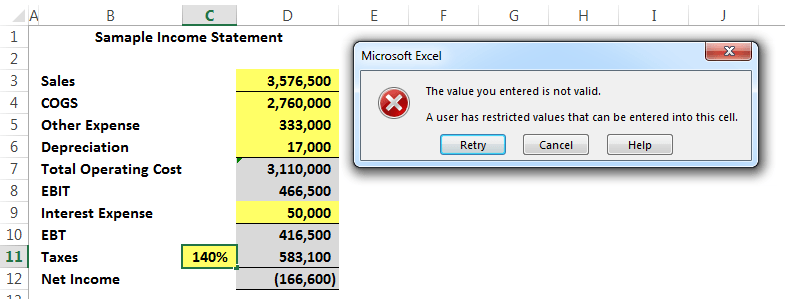
Referring to the income statement, we can make user enter only fractions too in the sheet. We can do it for the value of Tax that is already entered as 40% – because it is actual 40/100 or simply 0.4 we can created a rule where user can only input between 0 and 1. When we select this option following dialogue box is displayed.
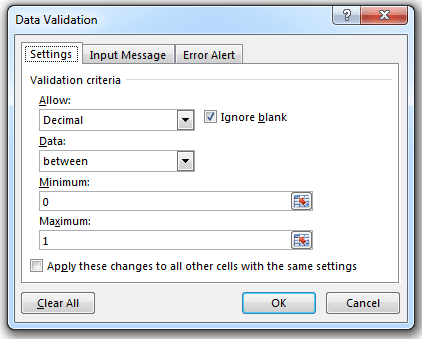
Entering a value of 110% will give an error message.
Lists:
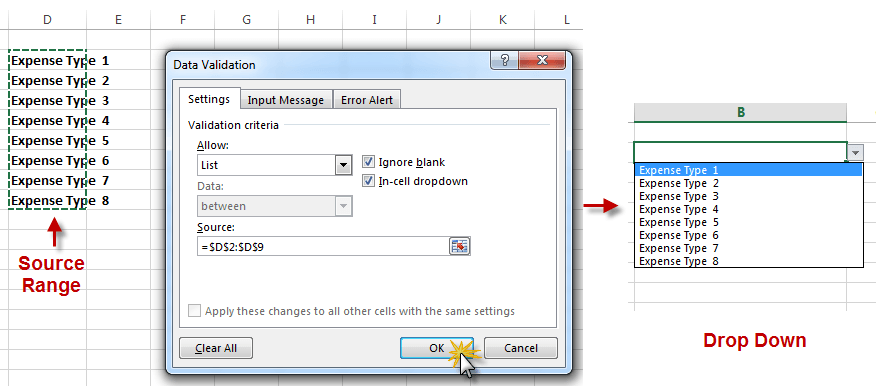
When we want to make user select from a given options we go for Lists in data validation. Simply place the options in where in the sheet and refer the range to list. Once we press enter the cell will be showing the drop down to select from:
Date:
These options are valuable when are trying to get dates and times in a given range. In the example sheet we have defined a range of date that starts from the 1st of Jan 2017 till today – (3rd Oct 2017). We can make user to input between these two ranges only.
When we choose this option, the data validation dialogue box appears with following settings:
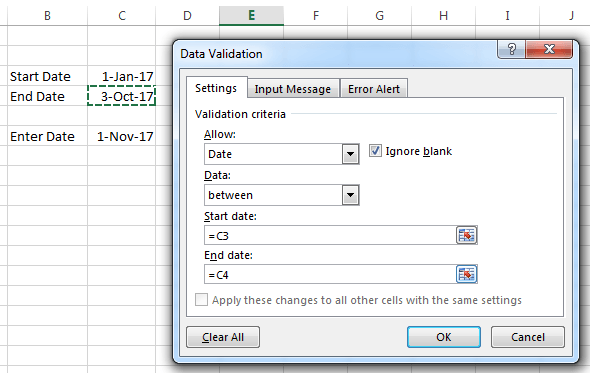
We have linked the Start Date and End Date to cell C3 and C4 respectively and the data validation it self can be applied to a range of cell (this can be done by selecting first the range of cell and then applying data validation).
Now user can only input values in this range – any date that does not lie in this range will produce an error.
Time:
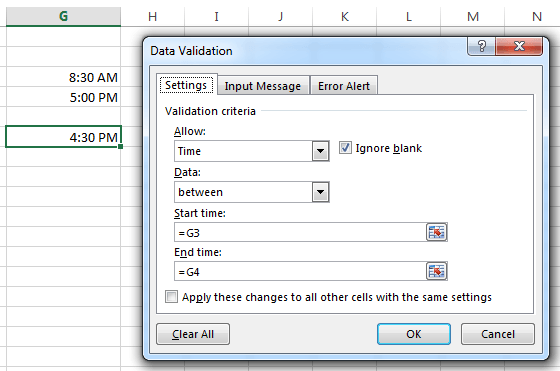
When we try to set the data validation for time, a dialogue box similar to that of date appear and we can link the cells to the input ranges. When we press ok the data validation is applied. For example refering to the attach screenshot (below) we have set the limit for time to be from 8:30 AM to 5:00 PM, if we try to input something that is beyond this time bracket – the dialogue box will show an error.
Text Length:
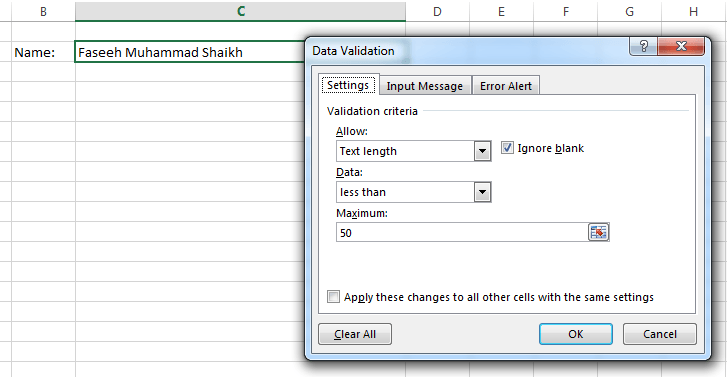
This option allows you to enter the text with limitation on its length. For example we can allow a user to input in a field “Name” with maximum length of 50 characters. Anything beyond 50 characters will produce an error.
When we access the dialogue box we are prompted for following:
Custom Values:
we can also set custom values for data validation. For example assume that user is entering assigned a departmental code that is appended to its employee number – FIN-001, other sample codes being ENG-001 (for engineering) and MKT-003 for marketing.
Through custom values we can set the formula for validation: =LEFT(G2,3)=”FIN”
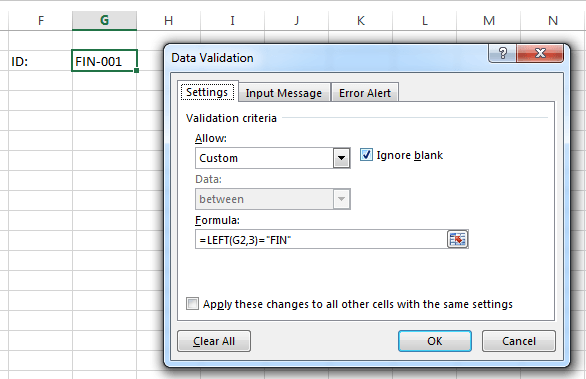
Any ID that is entered with affix other than FIN will generate an error.
Validation Criteria Options:
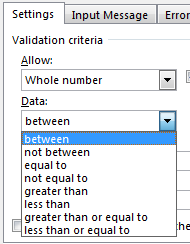
It should be noted that various options for data validation are available within each type of data validation. For example for whole numbers we can select between (two values), not between, equal to, not equal to, greater then and so more. Following is the complete list of options available.
The Input Message Tab:
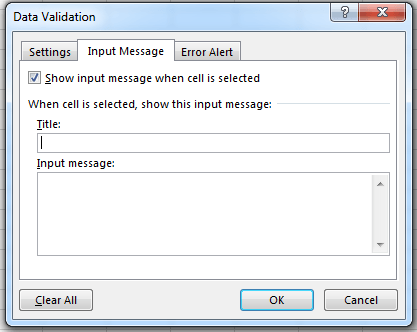
This tab can be used to display messages when a user inputs data in the cell with data validation. In the Title range we put the title for the message in the message body. Thus if user is set to input something he is informed beforehand what is expected input.
Error Alert:
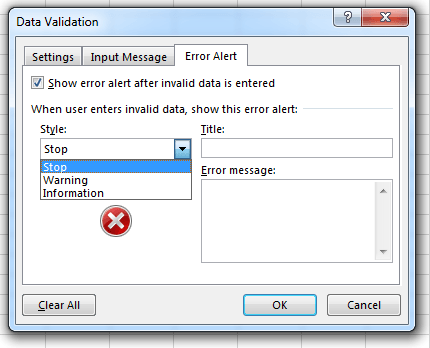
An error alert is initiated when we have wrong type of input – but data validation gives us option to customize the error alert message. We can put the custom tittle as well as message in the third tab and as we encounter the error this custom alter message is displayed.
Circling the Invalid Data:
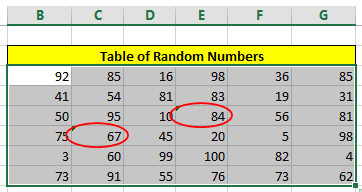
We can also check already entered data to confirm if it is of desired type. For example in the follow table of random numbers we may check it for being whole numbers and numeric values.
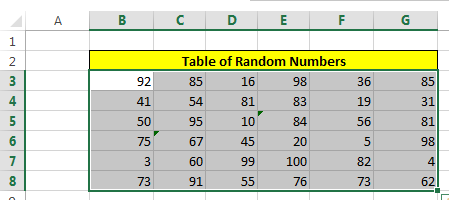
It is clear from the picture that value with green triangle on the left top is non-numeric values. When we apply the data validation the in-correct values are circle.
Conclusion:
The data validation is a very handy tool for accountant. It makes sure that correct type of data is being entered that will ensure correct results from the spreadsheets. Kindly download the companion file from here to see the examples.