Excel Tip #8: Create a New Custom Formatting Style
 In the previous tip, we looked at how to use the default Excel formats to quickly style your tables and other cells.
If none of those formats are exactly what you were looking for, then create your own style.
To create your own format in Excel:
- Select a single cell in your worksheet.
- Apply the desired formatting to the selected cell. Any formats are possible, including backgrounds, fonts, borders, etc.
- Click the Cell Styles button in the Styles group on the Home tab.
- If you don’t see the Cell Styles button, you can click the down arrow next to the different formats to open up the Cell Styles menu.
- Click the New Cell Style link at the bottom of the menu.
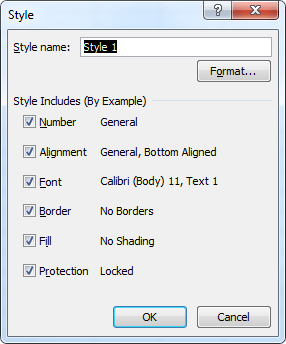
- All the included styles will be shown in the Style window.
- Give a descriptive name for your style in the Style name box.
- Un-check any of the included styles you don’t want to have applied to your custom style.
- If you want to edit some of the styles, click the Format button, and make the necessary changes.
- Click OK.
- Your style will be added to the Cell Styles menu in the Styles group on the Home tab under the Custom heading.
If you ever want to remove or edit your custom style, simply right click it and select Delete or Modify as appropriate.